


Intelligent glass that adjusts its opacity at the touch of a button, blending technology and aesthetics.
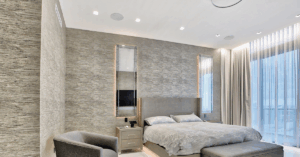
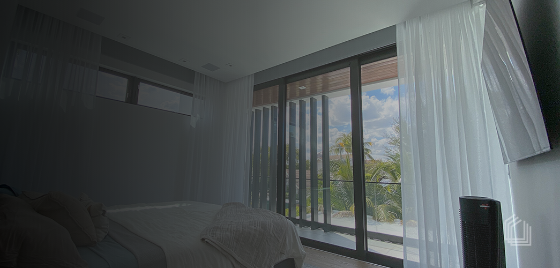
Practical and elegant, our blinds offer precise control of light and privacy, they are perfect for any environment.
Modern and functional shades, available in various styles and materials to complement any decor.
We can create a wonderful, smart home with our products
Practical and stylish, our blinds offer precise control of light and privacy, perfect for any setting.
Modern and functional shades, available in various styles and materials to complement any decor.
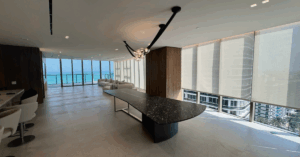
High-quality fabric draperies that add a touch of luxury and elegance to any room, with customizable options.
We can create a wonderful, smart home with our products
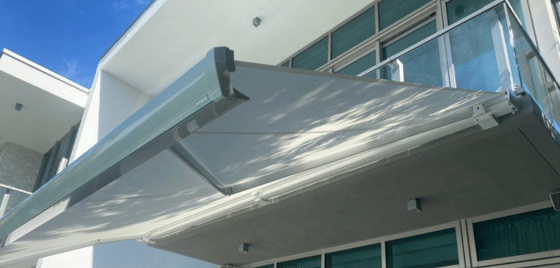
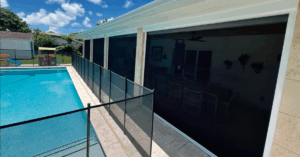
Durable and stylish awnings that provide shade and protection, ideal for residential and commercial exteriors.

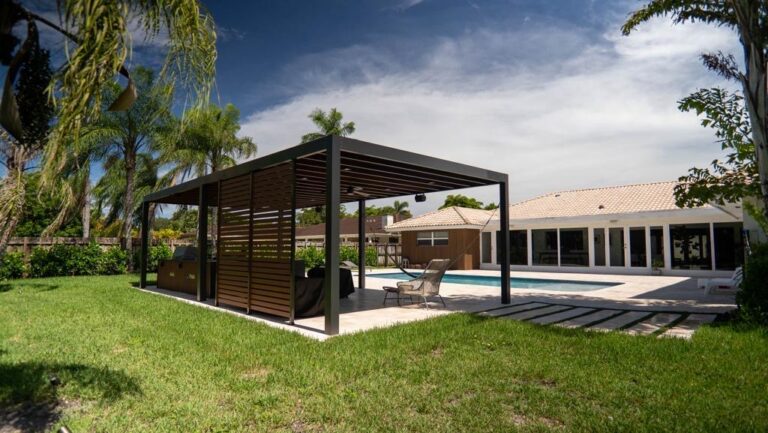
Exterior shades that offer sun protection and privacy, enhancing comfort in outdoor spaces.
We can create a wonderful, smart home with our products
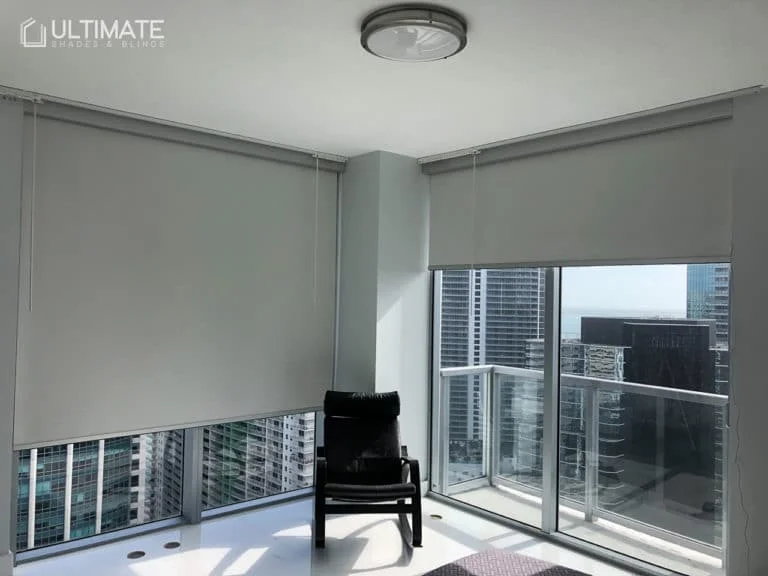
Living in Miami’s vibrant climate presents unique challenges for homeowners seeking comfort and privacy. The intense Florida sun can disrupt your daily routine, affect your sleep patterns, and damage your interior furnishings. Blackout roller shades have emerged as an essential window covering solution for Miami residents.
These specialized window treatments offer a perfect blend of functionality and style for your Miami home. You’ll gain precise control over natural light, protect your furniture from UV damage, and create a comfortable living environment throughout the year.
This comprehensive installation guide walks you through the process of adding blackout roller shades to your Miami residence. Whether you’re a DIY enthusiast or simply want to understand the installation process, you’ll discover:
If you’re considering professional help for this task, don’t hesitate to reach out to Ultimate Shades and Blinds for expert assistance.
Ready to transform your Miami homes? Let’s dive into the details of achieving a successful installation that enhances both your comfort and your home’s aesthetic appeal.
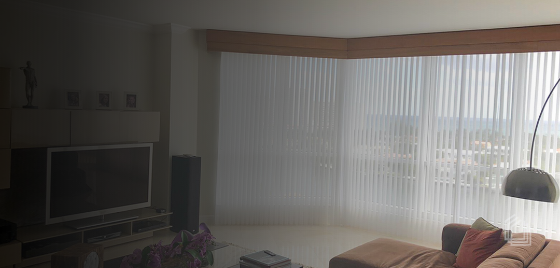
They are a great addition to your Miami home. They have the ability to block out light completely, making them perfect for creating a cozy and comfortable space. With these shades, you can easily control how much sunlight enters your home, giving you the flexibility to create the ideal atmosphere for any occasion.
These shades are not just a stylish choice, but also a practical investment for Miami homeowners. They offer essential light control features while also protecting your home’s interior from UV damage. The versatile design of blackout roller shades allows you to enjoy the view when you want, but still have complete privacy when needed.
Selecting the perfect blackout roller shades for your Miami home requires careful consideration of several key elements:
Your shade selection should align with your room’s specific requirements. South-facing rooms benefit from heat-resistant fabrics, while bedrooms might prioritize complete darkness. Consider factors like window size, room function, and existing architectural elements when making your choice.
Ultimate Shades & Blinds offers personalized consultations to help match your specific needs with the ideal blackout roller shade solution, ensuring both functionality and style for your Miami home.
A successful blackout roller shade installation requires specific tools and materials. Here’s your essential toolkit:
Safety Note: When working with power tools in Miami’s humid climate, ensure all electrical equipment is properly grounded and your workspace is dry. Keep your installation manual within reach throughout the process.
The right preparation sets the foundation for a smooth installation process. Your specific mounting style might require additional specialized hardware – check your shade’s installation guide for any unique requirements.
Accurate measurements serve as the foundation for a successful blackout roller shade installation in your Miami home. Let’s break down the measurement process into clear, manageable steps.
Remember: A professional measurement service from Ultimate Shades & Blinds can guarantee precise dimensions for your blackout roller shades, ensuring optimal light blocking and a perfect fit for your Miami windows.
Miami’s intense sunlight demands strategic shade selection. Your choice of blackout roller shades should address both functionality and aesthetics:
Colors:
Your selection should prioritize fabrics rated for South Florida’s climate conditions. Hunter Douglas certified materials offer superior performance in high-humidity environments while maintaining aesthetic appeal. Consider room-specific needs – bedrooms benefit from complete blackout properties, while living areas might need adjustable light control.
A successful blackout roller shade installation starts with having the right tools at hand. Here’s your essential installation toolkit:
Keep your tools organized in your workspace for easy access during installation. Miami’s humid climate can affect certain materials, so store metal components in a dry area until you’re ready to begin the installation process.
Bracket installation varies based on your chosen mounting style. Here’s how to properly secure your brackets:
For optimal performance, brackets should sit flush against the mounting surface. Double-check the bracket placement matches your measured marks before proceeding with shade installation.
With your brackets firmly mounted, you’re ready to secure your blackout roller shade. Here’s the precise installation sequence:
Pro Tip: If you notice any resistance or uneven movement, remove the shade and double-check your bracket alignment. A properly installed shade should move effortlessly without catching or binding.
For Miami homes, proper installation is crucial to maximize heat reduction and light blocking capabilities. A secure fit prevents light leaks and ensures optimal functionality during intense summer months.
Testing your blackout roller shade’s functionality ensures proper operation and longevity. Here’s your testing checklist:
Make small adjustments to brackets or tension as needed. A properly functioning shade moves smoothly, stays in position when stopped, and creates an effective light barrier.
A pristine installation requires attention to detail during the cleanup phase. Here’s your essential cleanup checklist:
Your blackout roller shade should now present a clean, professional appearance that enhances your room’s aesthetic while providing optimal light control for your Miami home.
Skip the DIY route and trust Ultimate Shades & Blinds’ Hunter Douglas certified installers for a flawless blackout roller shades installation. Our professional team brings:
You’ll receive personalized service from our Miami-based team, who understand local light control needs and climate considerations. Call us to schedule your free consultation at our showroom: 8171 NW 67 St, Miami, FL 33166.
Our certified installers maintain a 5-star rating across Yelp, Google, and Houzz, reflecting our commitment to excellence in every installation.
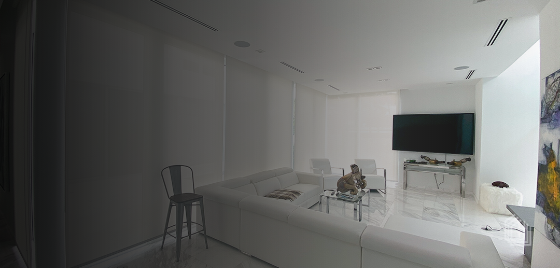
Blackout roller shades provide excellent light control, reducing sun disturbance and enhancing privacy, especially in urban areas. They also block harmful UV rays that can damage furniture and flooring, making them an ideal choice for Miami’s sunny climate.
When selecting blackout roller shades, consider fabric types, color options, and design elements that complement your home decor. Customization options are available at Ultimate Shades & Blinds to ensure your shades meet your specific style and light-blocking needs.
Essential tools for installation include a drill, screws, a level, and additional materials based on your mounting style such as brackets. Proper preparation of your workspace is also important to facilitate a smooth installation process.
The installation process includes measuring your windows accurately, choosing shades based on personal style and light-blocking needs, gathering necessary tools and materials, installing brackets according to mount type requirements, attaching the roller shade securely, testing its operation, and finally completing any finishing touches.
While you can install blackout roller shades yourself by following the step-by-step guide provided, hiring a professional installer from Ultimate Shades & Blinds ensures expert handling and optimal performance of your window coverings.
After installation, it’s essential to test the operation of your installed shade. If you encounter any issues, make necessary adjustments as outlined in the installation guide to ensure smooth functionality. If problems persist, consider consulting with a professional installer.
Let us know more about your project, your office or your house.
Our experts will help you choose the best options and materials for your house or office.
Let us know more about your project, your office or your house.
Our experts will help you choose the best options and materials for your house or office.